RC Car Demo
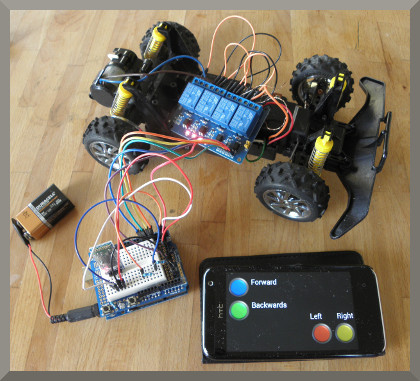
This panel has 4 buttons for controlling a radio controlled car.
An arduino Uno, Bluetooth HC-06 and 4 way relay were used to control the motor and solenoid of an old RC car.
About this demo
This demo uses the Bluetooth HC-05 or HC-06 module with an Arduino to communicate to an Android device with Bluetooth. Keuwlsoft's Bluetooth Electronics app is used with 4 buttons to control forward, reverse, left and right on a radio controlled car using relays.
This demo isn't about designing the car, so we cheated and picked up a non-functioning one and ripped out the old control circuitry that no longer worked.
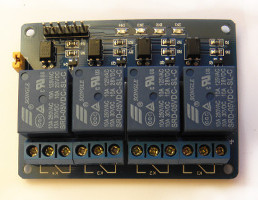
This left us with two connections for the motor and two connections to a solenoid which controlled steering. The motors and solenoid draw too much current to be operated directly from an Arduino output pin, so we used a readily available relay module to connect power to the motor/solenoid. Rather than use the same power supply as the Arduino, we used 6 AA batteries in the existing compartment below the car. Isolating the power side of the circuit to the Arduino is often a good idea when using relays if different voltages are being used or using components such as motors/solenoids that can create a nasty back emf when suddenly turned off.
This demo is really for you to adapt and control what you like with the relays or digital pins on the Arduino. It does not make a good RC car since movement will be jerky (ever been driven by someone who only knows to have their foot full on the accelerator or brake pedals?) There are better ways to control motors. Anyway, we hope you learn what you need from this demo and go on to create your own cool stuff.
Components used
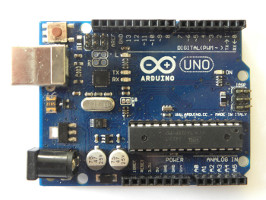
- Arduino Uno
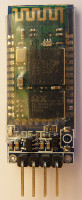
- HC-06 Bluetooth Module
- 4 way Relay Module
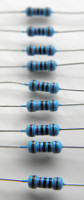
- 10k and 20k Resistors
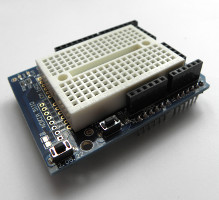
- Prototype Shield for Arduino Uno
- Old RC car
Circuit Diagram
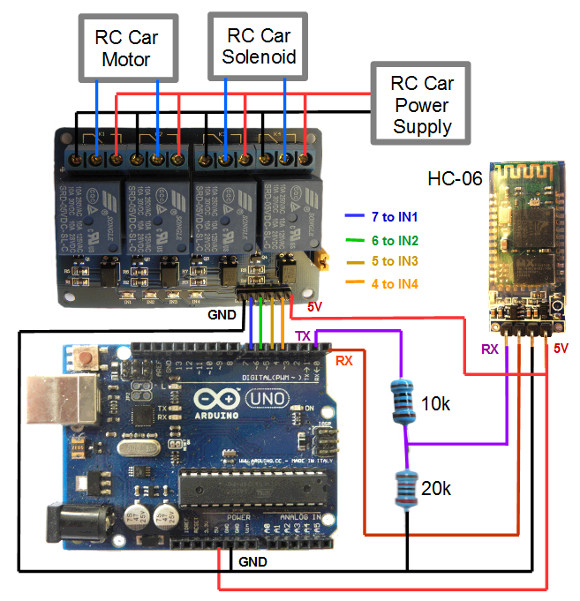
We are using an Arduino Uno for this demo, although you could use an alternative one if you prefer.
The Bluetooth modules have 4 connections, GND, 5V, RX and TX. The TX pin on the Bluetooth module connects to the RX pin on the Arduino and visa versa. For serial communication, a transmit (TX) connection needs to be received by a (RX) connection.
Note that the Bluetooth module operates at 3.3V. Supplying a 5V to the Bluetooth RX pin could damage it, such that a voltage divider should be used to supply a 3.3V signal to the RX pin. This is achieved in this demo with a 20k and 10k resistor. The TX pin of the Bluetooth module does not need modification and can connect directly to the Arduino RX pin. This is because the HIGH on 3.3V logic will still be recognised as a HIGH on the 5V logic circuitry on the Arduino.
Arduino code
//RC Car Bluetooth Serial Link Demo
//By keuwlsoft:  www.keuwl.com  23rd Aug 2015

char BluetoothData; // the Bluetooth data received

void setup() {

  Serial.begin(9600);

  //Set Digital Pins 4 to 7 as Output
  pinMode(4,OUTPUT);
  pinMode(5,OUTPUT);
  pinMode(6,OUTPUT);
  pinMode(7,OUTPUT);

  //Set State of Pins all to LOW (0)
  digitalWrite(4,0);
  digitalWrite(5,0);
  digitalWrite(6,0);
  digitalWrite(7,0);

}

void loop() {

  if (Serial.available()){

    BluetoothData=Serial.read(); //Get next character from bluetooth

    if(BluetoothData=='R'){ // Red Button Pressed
      digitalWrite(4,1); //Turn digital out 4 to High
      digitalWrite(5,0); //Turn digital out 5 to Low
    }
    if(BluetoothData=='Y'){ // Yellow Button Pressed
    digitalWrite(5,1);
    digitalWrite(4,0);
    }
    if(BluetoothData=='r'||BluetoothData=='y'){ // Red or Yellow Button Released
      digitalWrite(4,0);
      digitalWrite(5,0);
    }
    if(BluetoothData=='G'){ // Green Button Pressed
      digitalWrite(6,1);
      digitalWrite(7,0);
    }
    if(BluetoothData=='B'){ // Blue Button Pressed
      digitalWrite(7,1);
      digitalWrite(6,0);
    }
    if(BluetoothData=='g'||BluetoothData=='b'){ // Green or Blue Button Released
      digitalWrite(7,0);
      digitalWrite(6,0);
    }

  }

  delay(10);// wait 10 ms

}
Bluetooth Electronics App
1) Run the Bluetooth Electronics app, click edit, find an empty panel and select buttons
2) Add 4 buttons, one blue, one green, one red an one yellow. The default send codes for these buttons are capital “B”, “G”, “R” or “Y” for pressing, and “b”, “g”, “r” and “y” for releasing. I.e the first letter of the color name. Since these correspond to the Arduino code above, we don't need to edit anything if these buttons are used. Alternatively select library and navigate to the RC car demo and copy to panel.
3) We need to connect the Bluetooth device. Turn on power to your circuit so that the LED on the Bluetooth module starts flashing. Click connect on the main screen of the app. If not already paired, click on discover and wait for the device to appear in the list below. Select the device (e.g. HC-06) and click on pair. When requested you will need to enter a pin number, which is usually 1234 for these devices. Once paired, the device will appear on the right hand side. Select it and click on connect. Hopefully this was successful, return to the main screen.
4) The run button should be enabled, now that we have connected to the Bluetooth device. Click run and to test it out.